Effective MacBook - Sequoia Edition
I've been using MacBooks and macOS for more than 7 years as I write this guideline. As a programmer, the devices serve me well and are worth the money. The hardware is solid and just works: the trackpad, screen, processors, battery, webcam, microphones...Every aspect of the machine is well engineered to do their jobs. The software is the combination of good graphical interface and command-line interface on the Unix foundation. It's a very good environment for both typical users and power-users. But how we use the machine will dictate our experience with it, the usefulness and the love-hate relationship that we usually find on the Internet regarding the MacBooks. This guideline presents an opinionated way to use the MacBook with these simple goals:
- Make the machine easy to use, reliable and predictable.
- Utilize full potential of the machine.
In order to achieve those goals, the user needs the mindset:
- Embrace the MacBook-macOS characteristic, don't try to demand what it cannot do.
- Minimize the uses of third party utilities to keep the setup simple.
- Realize that default settings are not optimal and are waiting for customization.
Let's walk through the settings to use the MacBook effectively.

Trackpad
The MacBook's trackpad is the best of its kind, we can use it daily without missing the mouse. We need some customization to gain all of its usefulness.
All settings in this section are carefully selected for convenience and don't conflict with each other.
Enable tap-to-click
The tap-to-click is disabled by default to prevent user from triggering it accidentally but macOS already has reliable palm rejection, no need to worry about this. Enabling tap-to-click will help us interact with the MacBook in a natural way and keep us comfortable for a long session.
Under System Settings > Trackpad > Point and click.
- Tap to click: On.
With this setting, we will have:
- One-finger tap: left click.
- Two-finger tap: right click.
Keep natural scrolling
The natural scrolling works the same as what we have on smartphone. Microsoft Windows users tend to turn it off, but I encourage you to accept the difference and learn the new way to interact with these machines.
Enable look up (for whom English is not the first language)
I often need to open the Dictionary to know a new word. macOS has a convenient way to look up any word on the screen with a three-fingers tap.
Under System Settings > Trackpad > Point and click.
- Look up & data detectors: Tap with Three Fingers.
Enable dragging
Using three-fingers for dragging is fast and precise, it's good for casual dragging. If the work requires a lot of dragging, use the mouse.
Under System Settings > Accessibility > Pointer Control > Trackpad Options…
- Use trackpad for dragging: On.
- Dragging style: three finger drag.
Disable swipe between pages
Swipe between pages is good on iPhone but on MacBook I found it often misunderstood me when I did horizontal scroll on the web page. Disable it makes the system behave in a reliable way.
Under System Settings > Trackpad > More Gestures.
- Swipe between pages: Off.
Fine tune four fingers
We won't use four-fingers gestures so often, but we will make them useful in two scenarios:
- Want to see all opened windows: swipe four-fingers up.
- Want to see all windows of an app: swipe four-fingers down.
Under System Settings > Trackpad > More Gestures.
- Mission Control: Swipe Up with Four Fingers.
- App Exposé: Swipe Down with Four Fingers.
Keyboard
macOS keyboard has some hidden features that slow us down. The default settings aren't optimal. We will customize them for faster interaction.
Change input source shortcut (for those using more than 1 input source)
If English is not your first language, you may have multiple input sources. Setting a keyboard shortcut will help you switch between them faster.
Under System Settings > Keyboard
- Text Input > Input Sources > Edit: Add dvorak input source from English.
- Keyboard Shortcuts… > Input Sources.
- Uncheck "Select the previous..."
- Check "Select next..."
- Change the key-combination to
Ctrl + Opt + Cmd + Space.
Why disable Select the previous...? To reduce overload, only one shortcut is needed.
Why Ctrl + Opt + Cmd + Space? Because it is easy enough to trigger, won't
interfere with similar shortcuts (Cmd + Space: Spotlight,
Ctrl + Opt + Space: specialized input method from third party utility).
Disable auto-correction
I find auto-correction is more annoying than helpful.
Under System Settings > Keyboard > Text Input > Input Sources > Edit.
- Correct spelling automatically: Off.
- Capitalize words automatically: Off.
- Add period with double-space: Off.
- Spelling: U.S. English.
- Use smart quotes and dashes: Off.
Maximize key repeat rate
The default settings are too slow especially when we want to delete some words, re-correct a typo or move the caret using arrow keys.
Under System Settings > Keyboard.
- Key repeat rate: Fastest.
- Delay until repeat: Shortest.

Turn off Global key
The Global is a source of frustration every time we accidentally tap it. I'm happier to keep it as the fn key.
Under System Settings > Keyboard.
- Press “Global (Fn)” key to: do nothing.
Disable press and hold popup
Press and hold popup is a small menu that appears when we hold down some
letter keys (like e, a, u) to help us type accented characters (like é,
à, ü). It prevents us typing repeated characters, and we don't need this
feature because most non-English users have superior ways to type their first
language.
Open Terminal app and type the following command:
defaults write -g ApplePressAndHoldEnabled -bool No
Appearance
We will try to optimize the screen space for content.
Use smaller dock
We usually don't need the Dock because we can use Spotlight for opening apps,
Cmd + Tab for switching between apps, Cmd + ` for switching between
windows of the same app. The Dock is only needed to reveal the minimized
windows.
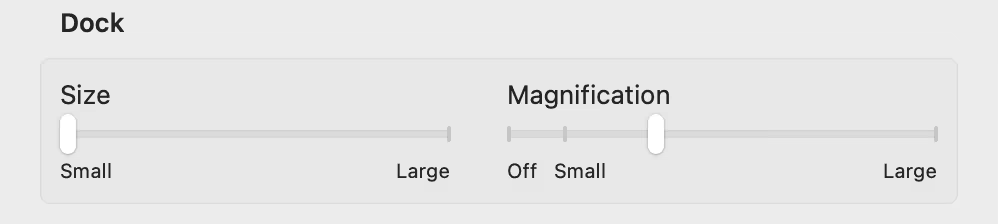
Under System Settings > Desktop & Dock.
- Size: smallest.
- Magnification: triple size of the small mark in the bar.
- Position on screen: Left.
- Automatically show and hide the Dock: On.
- Show suggested and recent apps in Dock: Off.
These settings will move the Dock to the left, make it smaller and hide it, leave the screen to display the actual application.
Dark dock and menu bar on light mode (it's a matter of taste)
I find the Dock and menu bar look better on dark background, but I don't like the dark mode. The following settings will keep the Dock and menu bar dark while the theme is still in light mode.
Steps:
- Login to user.
- System Settings > Appearance: Select Light Mode.
- Run command:
defaults write -g NSRequiresAquaSystemAppearance -bool Yes - Logout and login again.
- System Settings > Appearance: Select Dark Mode.
Other settings
Prefer opening new tab by default on Finder
Under System Settings > Desktop & Dock > Windows.
- Prefer tabs when opening documents: Always.
Spotlight keyboard shortcut
Under System Settings > Keyboard > Keyboard Shortcuts... > Spotlight
- Spotlight search: Cmd + Space.
- Show Finder search window: Uncheck.
Paste and Match Style
Under System Settings > Keyboard > Keyboard Shortcuts... > App Shortcuts.
- Add new app shortcuts.
- Application: All Applications.
- Menu Title: Paste and Match Style
- Keyboard Shortcut:
Cmd + Shift + V.
Turn off Hot Corners
Hot corners is a creative feature, but I accidentally trigger it many times. It's better to turn it off so that the system works predictably.
Under System Settings > Desktop & Dock > Hot Corners... (optional)
- Turn off all corners.
Lock when display off
The MacBook is a wonderful portable device and we will bring it to the coffee shop eventually. Setting the lock time is a good idea.
Under System Settings > Lock Screen.
- Start Screen Saver when inactive: For 2 minute.
- Turn display off on battery when inactive: For 3 minutes.
- Turn display off on power adapter when inactive: for 5 minutes.
- Require password after screen saver begins or display is turned off: Immediately.
These settings are quite tight, but you can adjust it based on your preference.
Enable Zoom Screen
macOS has built-in zoom feature that works everywhere, it's useful when we want to see a portion of the screen clearly.
Under System Settings > Accessibility > Zoom.
- Use scroll gesture with modifier keys to zoom: Enabled.
- Modifier key for scroll gesture:
Ctrl.
Now we can hold Ctrl and use scroll up gesture to zoom-in, scroll down
gesture to zoom-out. The cursor will be the target for zooming.
Keep Spaces Predictable
Applying this setting will keep the space position work similarly to app
position when Cmd + Tab.
Under System Settings > Desktop & Dock > Mission Control.
- Automatically rearrange Spaces based on most recent use: Enabled.
Reduce Motion
When we switch between apps or spaces too often, the transition effects (motion) become annoying and we will lose our patience. We can reduce the transition time by changing to simpler effects.
Under System Settings > Accessibility > Display.
- Reduce motion: Enabled.
Finder settings
The following settings will increase quality of life and accuracy when working with Finder.
General.
- New Finder windows show: Downloads (or workspace).
Advanced
- Show all filename extensions: checked.
- Keep folders on top:
- In windows when sorting by name: checked.
Amethyst settings
Amethyst is a tiling windows manager. In our use case, we use Amethyst for the
only purpose: always maximize the application windows. It will help us maximize
the working space. If we want to switch between windows, we will use Cmd + Tab
instead of using mouse or Dock.
Download: https://github.com/ianyh/Amethyst/releases/
Install: copy Amethyst.app to the application directory.
We need to enable Accessibility for Amethyst, because it will control the windows automatically.
Under System Settings > Privacy & Security > Accessibility
- Add
Amethyst.appto the allowed list.
Under dropdown menu when clicking on menu bar icon.
- Start Amethyst on Login.
Under Preferences... > Layouts.
- Keep layout Fullscreen, remove all other layout.
Under Preferences... > Shortcuts.
- Remove all shortcuts, we don't need them because we use Amethyst to maximize the windows.
Under Preferences... > Floating.
- Select _Automatically float all applications except those listed.
- Add the applications which we want to maximize automatically to the list bellow the dropdown.
Restart Amethyst to apply the settings.
These settings will maximize the selected application windows. Give use more space to work and consistent working behavior.
GoTiengViet settings (for Vietnamese)
Vietnamese input is never a solved problem on macOS (and also iOS) because the input framework does it wrong. I tried all Vietnamese input utilities under the sun, and they all failed me. GoTiengViet is the least problematic one, and I like the frankness of the author.
Download: https://www.trankynam.com/gotv/
Install: copy GoTiengViet.app to the application directory.
Under System Settings > Privacy & Security > Accessibility
- Add
GoTiengViet.appto the allowed list.
Settings
- Uncheck: Hiện biểu tượng trên thanh Dock.
- Check: Tự động chạy khi Login.
- Uncheck tất cả phần Chính tả.
- Phím tắt chuyển E/V:
Ctrl + Opt + Space. - Phím tắt xóa trạng thái gõ:
Ctrl. - Xóa hết phím tắt còn lại, kể cả trong phần input.