OpenBSD's VPN
Note: I wrote the guideline based on OpenBSD 6.9. The setup is still working on OpenBSD 7.6.
I'm going to set up VPN with iked, a built-in VPN software from OpenBSD. The main focus of this setup is routing all outbound traffic from clients to my Gateway. The Gateway is running OpenBSD, the clients are Android, iOS, MacOS.
The iked supports IKEv2 which is suitable for iOS and macOS without additional client, Android could connect via strongSwan. iked supports authentication with shared secret, keypair and certificate. The shared secret is the simplest method but least secure because the whole network is at risk if the shared secret is compromised. Keypair is the next simpler method, but it requires adding the public key to iked every time we add new client. Certificate is the most complicated one, we need to set up a Public Key Infrastructure (PKI) for our system, later, we only need to issue a valid certificate for new client, no change to the iked. I will use PKI for my iked setup.
Overview
Prerequisites
- an OpenBSD installation.
- iked is installed by default.
- a self-signed Root CA.
- a server certificate and keypair.
- a client certificate and keypair.
Planning the VPN
The above diagram shows related components in my setup.
The Gateway is running OpenBSD, I will need 2 services:
- pf: filter and route traffic between network interfaces.
net.inet.ip.forwarding=1should be set for pf routing. - iked: manage VPN connections.
PKI plays important role to make sure the VPN connection is established and secured. Because I use self-signed Root CA, the Root CA should be installed on both iked and clients. Otherwise, the systems will not trust server and client certificates.
Step 1 · Generate CA, certificate and keypair in PEM format
I use self-signed CA to create all certificates:
- Root CA certificate and intermediate CA.
- Server certificate.
- Client certificate.
I prepared these CAs and keypair in my Macbook because I don't want to leak my Root CA private key. I use JDK 17's keytool for generating CA and keypair.
Generate self-signed Root Certificate Authority.
I will create a PKCS12 keystore named root_ca.pfx to store the self-signed
Root CA and its private key. The keystore should be secured at all cost to
protect the system trusted in it.
keytool -keystore root_ca.pfx \
    -storetype pkcs12 \
    -alias example_root_ca \
    -genkeypair \
    -keyalg EC \
    -groupname secp256r1 \
    -sigalg SHA256withECDSA \
    -validity 3654 \
    -ext bc:c
Explanation:
-keystore root_ca.pfx: use the keystoreroot_ca.pfx, create new keystore if it's not existed.-storetype pkcs12: use PKCS12 format which is supported by many programs, especially Apple Configurator 2.-alias example_root_ca: the keystore can store many alias, I will store the new Root CA to alias calledexample_root_ca.-genkeypair: tell keytool to generate a keypair (public key and private key).-keyalg EC,-groupname secp256r1: the algorithm used to create the keypair. EC mean ECDSA, a modern algorithm. It's more secure than RSA and the key size is shorter (256 compare to RSA's 2048).-sigalg SHA256withECDSA: the method to self-sign the Root CA. It should match with-keyalg.-validity 3654: the Root CA will valid for next 10 years.-ext bc:c: indicate this is Root CA.
When running the above command, keytool ask for information about the Root CA, enter what suitable for you.
- Keystore password: this password will protect all aliases in the keystore.
- First and last name (Common Name of the certificate)?
- Organizational unit?
- Organization?
- City?
- State?
- Country?
Generate and sign intermediate CA.
I can use the Root CA to sign server & client certificate, but it will risk all systems if the Root CA is compromised. Because our systems will trust any certificates signed by this Root CA. The good practice is creating an intermediate certificate and using this certificate to sign server & client certificates. If the intermediate certificate is compromised, I will add it to Certificate Revocation List (CRL) and our systems will not trust it anymore.
I will create intermediate_ca.pfx
keytool -keystore intermediate.pfx \
    -storetype pkcs12 \
    -alias intermediate_ca \
    -genkeypair \
    -keyalg EC \
    -groupname secp256r1 \
    -sigalg SHA256withECDSA
I will create a sign request for intermediate CA and use the Root CA to sign the intermediate CA. You can read more about how PKI work to know why we should do these steps.
Create sign request.
keytool -keystore intermediate.pfx \
    -alias intermediate_ca \
    -certreq -file intermediate_ca.certreq
Use Root CA to sign the intermediate certificate.
keytool -keystore root_ca.pfx \
    -alias root_ca
    -gencert \
    -rfc \
    -ext BC=0 \
    -validity 3650 \
    -infile intermediate_ca.certreq \
    -outfile intermediate_ca.crt
Explanation:
-alias root_ca: we will useroot_cato sign the intermediate certificate.-gencert: sign the certificate.-rfc: use PEM format for the signed certificate.-ext BC=0: indicate this is intermediate CA.-validity 3650: the CA will be valid for next 10 years.-infile intermediate_ca.certreq: the sign request of the intermediate certificate.-outfile intermediate_ca.crt: the intermediate certificate signed by Root CA.
Import the signed certificate to intermediate_ca.pfx for storage. We need to
import the Root CA first, because the keytool only allow us importing the valid
certificate. Without the Root CA in keystore, keytool will not trust our
self-signed certificates.
# Export Root CA from root_ca.pfx.
keytool -keystore root_ca.pfx -alias root_ca -exportcert -rfc -file root_ca.crt
# Import Root CA to intermediate_ca.pfx.
keytool -keystore intermediate_ca.pfx -alias root_ca -importcert -trustcacerts -file root_ca.crt
# Import signed certificate to intermediate_ca.pfx.
keytool -keystore intermediate_ca.pfx -alias intermediate_ca -importcert -file intermediate_ca.crt
Generate VPN server certificate.
I will create the VPN server certificate and store in vpn_server.pfx, this
certificate will have important -ext SAN=DNS:<hostname> option.
keytool -keystore vpn_server.pfx \
    -storetype pkcs12 \
    -alias vpn_server \
    -genkeypair \
    -keyalg EC \
    -groupname secp256r1 \
    -sigalg SHA256withECDSA
I will repeat the steps that I've done for intermediate certificate:
- Sign VPN server with intermediate CA.
- Remember to replace the
-ext BC=0with-ext SAN=DNS:vpn.example.combecause the certificate will be used for VPN server. It's important that the Common Name also use the same value with this option. -validity 366: the server certificate will have shorter valid time, to make sure I remember how to manage them.
- Remember to replace the
- Import Root CA to
vpn_server.pfx. - Import signed server certificate to
vpn_server.pfx.
Generate client certificate.
Generating the client certificate will be similar to server certificate except
the option -ext SAN=DNS:vpn.example.com is replaced by
-ext SAN=email:[email protected]. The user is used to identify individual
client. In the end, I will have a keystore vpn_user.pfx, I will use this
keystore, together with root_ca.crt and intermediate_ca.crt, to configure
the VPN client.
I will generate a certificate for each client in my home (phones, Macbooks).
Note: legacy iOS, e.g. iOS 15 require older crypto algorithm to work with, we
need -J-Dkeystore.pkcs12.legacy=true option to generate valid PKCS #12
keystore
keytool -keystore vpn_user.pfx \
    -storetype pkcs12 \
    -alias vpn_user \
    -genkeypair \
    -keyalg EC \
    -groupname secp256r1 \
    -sigalg SHA256withECDSA \
    -J-Dkeystore.pkcs12.legacy=true
- Sign VPN client with intermediate CA.
- Import Root CA to
vpn_server.pfx. - Import signed server certificate to
vpn_user.pfx.
Step 2 · Set up PKI for iked
I will put all certificates and keypair in the previous steps to iked. It requires some preparation:
- Export Root CA to
root_ca.crt. - Export Intermediate CA to
intermediate_ca.crt. - Export VPN server certificate to
vpn_server.crt. - Export VPN server private key to
vpn_server.key. Use this command:openssl pkcs12 -in vpn_server.pfx -nocerts -out vpn_server.key -nodes
Build the ca.crt by combining the root_ca.crt and intermediate_ca.crt, it
will look like:
-----BEGIN CERTIFICATE-----
<intermediate-ca>
-----END CERTIFICATE-----
-----BEGIN CERTIFICATE-----
<root-ca>
-----END CERTIFICATE-----
Copy the certificates and private key to their places:
- Rename
/etc/iked/local.pubto/etc/iked/local.pub.original - Rename
/etc/iked/private/local.keyto/etc/iked/private/local.key.original - Copy
ca.crtto/etc/iked/ca/ca.crt - Copy
vpn_server.crtto/etc/iked/certs/vpn.example.com.crt - Copy
vpn_server.keyto/etc/iked/private/local.key
Important: all certificates should have 640 permission.
Step 3 · Configure iked
Enable iked
iked is disabled by default, I will enable it.
rcctl enable iked
iked configuration
Create a /etc/iked.conf with permission 640, otherwise iked will complain
about incorrect permission.
ikev2 "Example VPN" passive esp \
  from dynamic to any \
  from any to dynamic \
  peer any \
  ikesa enc aes-256 \
    prf hmac-sha2-256 \
    auth hmac-sha2-256 \
    group modp2048 \
  childsa enc aes-256 \
    auth hmac-sha2-256 \
    group modp2048 \
  srcid vpn.example.com \
  lifetime 180m bytes 16G \
  config address 192.168.120.0/24 \
  config name-server 8.8.8.8 \
  config name-server 8.8.4.4 \
  tag "$name-$id"
Explanation:
from dynamic to any: traffic from VPN IP to any host will match with this configuration.from any to dynamic: traffic from any host response to VPN IP will match with this configuration.peer any: the peer (client) can connect to Gateway from any IP address.srcid vpn.example.com: will tell iked to use the certificate / private keyvpn.example.com.config address 192.168.120.0/24: the network of VPN, required to usedynamickeyword.
Check configuration.
iked -n
Start iked.
rcctl enable iked
Assign static IP for enc0
When iked started, the VPN interface appeared as enc0 but no IP is assigned,
this setting will work fine unless I want to listen on that interface. In my
case, I will assign 192.168.120.1 to enc0. In fact, this IP already assigned
to the VPN server, but we need this explicit step to listen on that address. In
my case, I will set up an Unbound DNS server only listen on the VPN interface.
/etc/hostname.enc0
---
inet 192.168.120.1 255.255.255.0
Apply the change.
sh /etc/netstart
Step 4 · Configure pf
Enable IP forwarding to let the kernel forward packages destined to other hosts.
doas sysctl net.inet.ip.forwarding=1
doas sh -c 'echo "net.inet.ip.forwarding=1" >> /etc/sysctl.conf'
pf configuration
Allow port 500/udp and 4500/udp, NAT source address from VPN to public
address.
/etc/pf.conf
---
wan = vio0
vpn = enc0
...
match out on $wan inet nat-to ($wan:0)
pass in quick on $wan inet proto udp from any to ($wan:0) port {500, 4500} keep state label ipsec
pass in quick on $vpn inet keep state (if-bound)
Reload pf rules
pfctl -f /etc/pf.conf
Step 5 · Client configuration
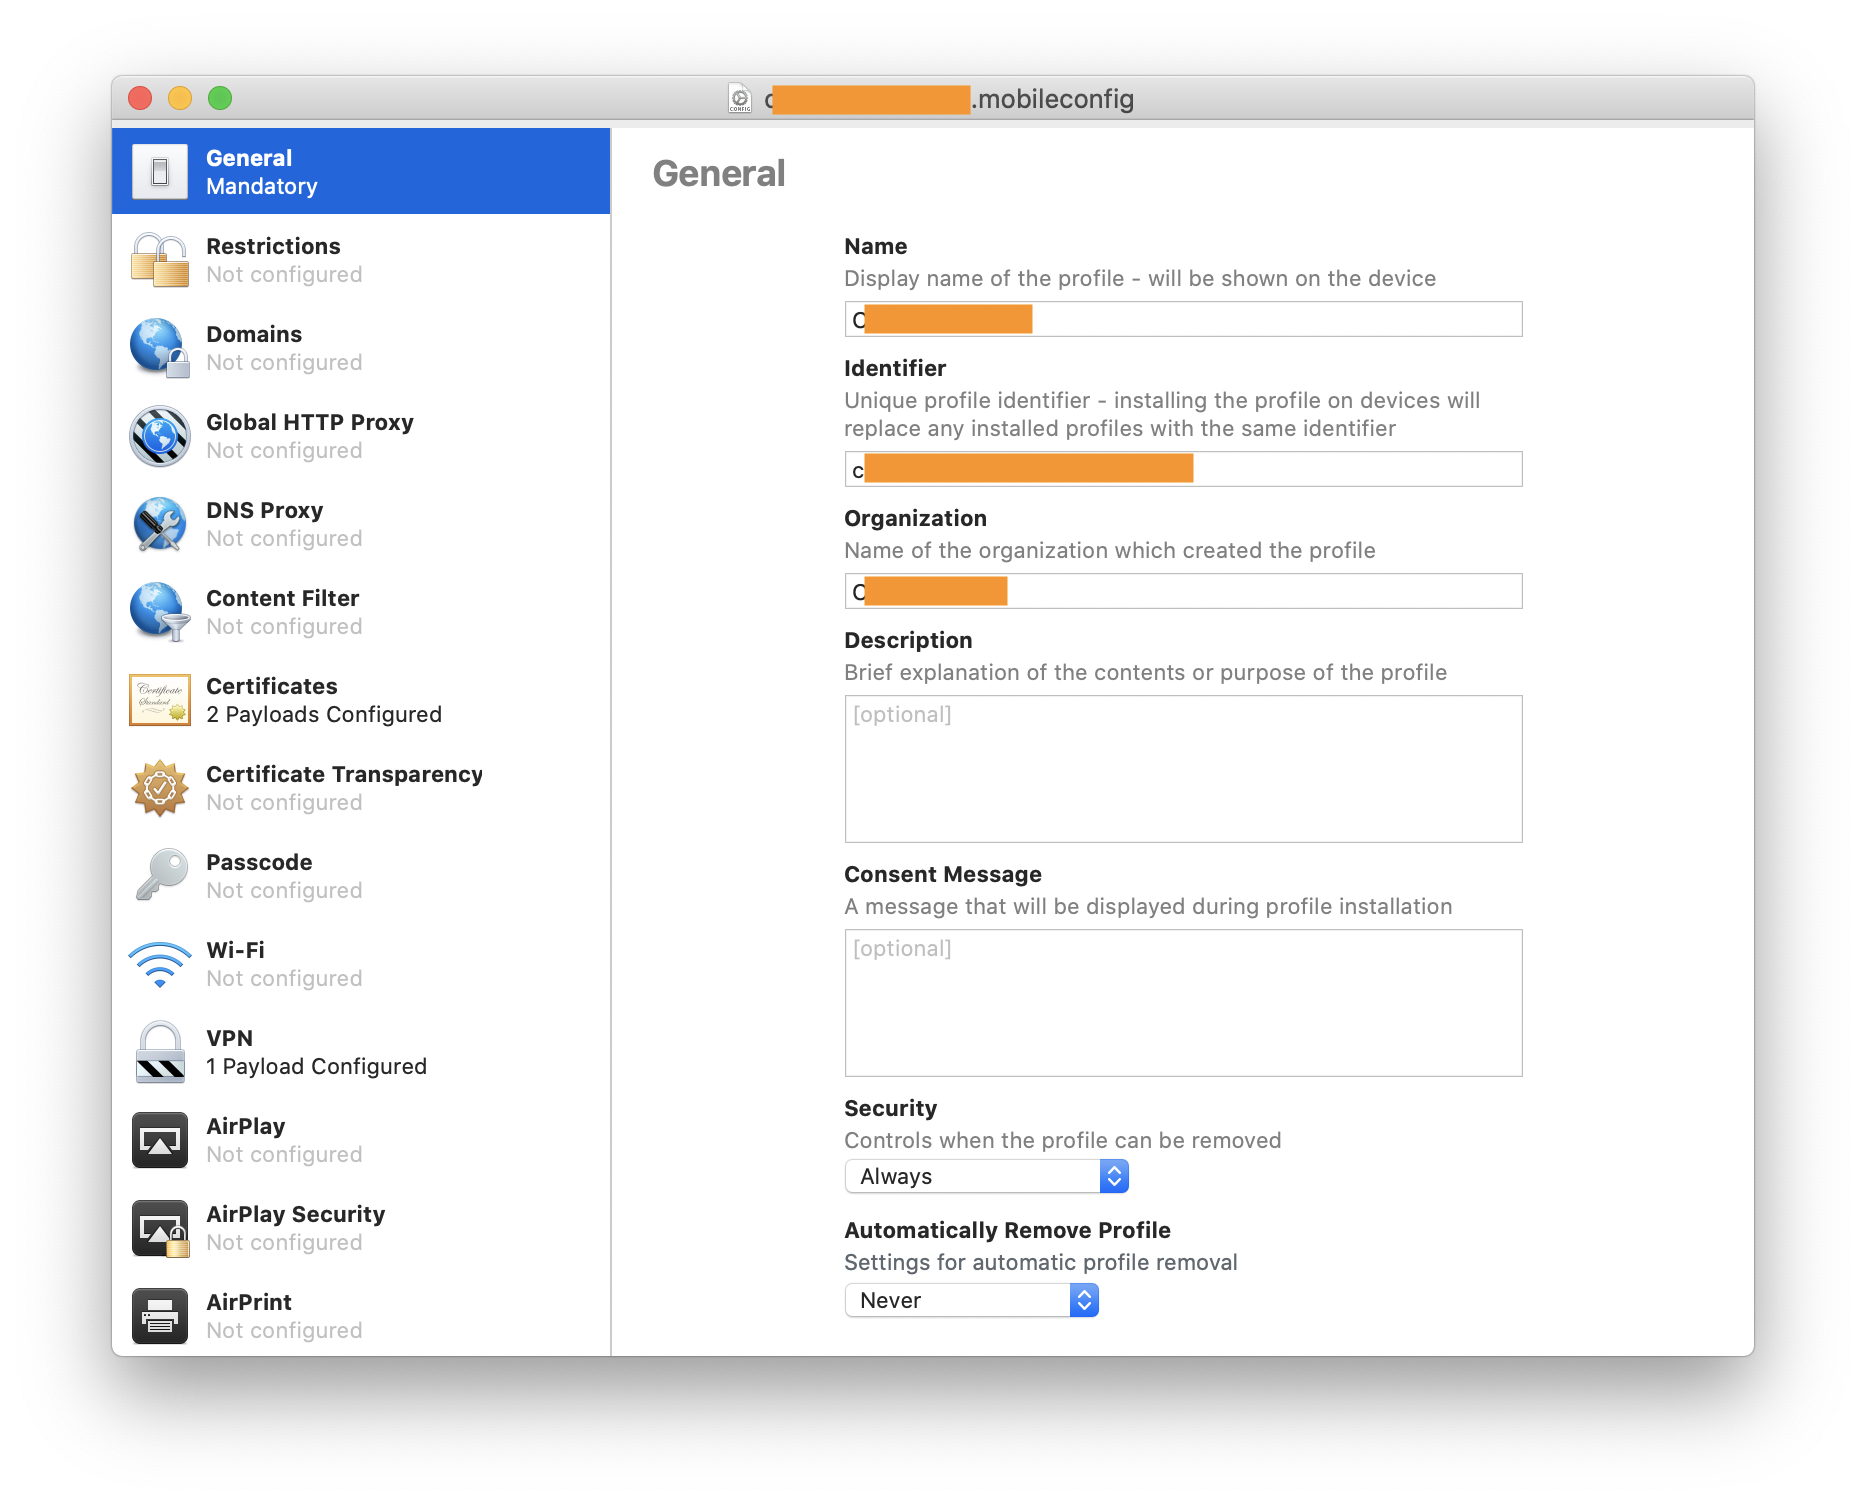
Use Apple Configurator 2 to configure VPN profile for Apple devices.
General
- Name: Example
- Identifier: example
- Organization: Example

Certificates
- Root CA (root_ca.crt).
- Intermediate CA (intermediate_ca.crt).
- Client certificate and private key (vpn_user.pfx).
Note: Apple Configurator 2 only allow PKCS1 and PKCS12 keystore.

VPN
- Connection Name: Example VPN
- Connection Type: IKEv2
- Server: vpn.example.com
- Remote Identifier: vpn.example.com
- Local Identifier: [email protected]
- Machine Authentication: Certificate
- Certificate Type: ECDSA


Reference:
- https://www.going-flying.com/blog/protecting-my-macos-and-ios-devices-with-an-openbsd-vpn.html
- https://www.jasworks.org/openbsd-ikev2-home-vpn/
- https://blog.lambda.cx/posts/openbsd-vpn-gateway/
- https://docs.oracle.com/javase/8/docs/technotes/tools/unix/keytool.html
Entry History
- 2021-01-14 · Created.
- 2024-12-15 · Tested on OpenBSD 7.6. Refine keytool command to create keystore for iOS 15.
